Video Tutorial Coming Soon!
Introduction to Google Tag Manager
What is Google Tag Manager used for?
Google Tag Manager is most commonly used to add tracking “tags” to specific pieces of content for the purpose of tracking how that piece of content is being utilized by a website’s visitors.
“How does Google Tag Manager work?” you might ask.
Check out this button:
While this button doesn’t actually take you anywhere special, we have a tag on it that tracks how many times it has been clicked.
The trigger is fired when the button gets clicked which activates the tag to proceed with its instructions. In this case, to count the number of times the trigger fires.
Why use Google Tag Manager?
Google Tag Manager is a tool that allows us to track how efficient our content is performing on our website.
If your “call to action” button is being clicked often, congratulations! You’ve put that button right where it belongs.
If your button isn’t getting many clicks, it may be worth re-organizing the location of that button to a more functional or eye-catching place.
Stagnate content is wasted space. If pieces of content are not being utilized, it should be re-organized or removed from your site entirely to make room for more exciting and better-performing content.
How To Install Google Tag Manager on your website
For WordPress Users:
- Download this google tag manager plugin.
- Open google tag manager and login to your google account.
- Click “create account” at the top right.
- Fill out the empty fields and select WEB under “Where to Use Container”
- Accept the terms and conditions without reading them. (Just kidding everyone should always read the terms and conditions right?)
- A popup will appear that says “install google tag manager.” In the first box, second to the last line, you will see a piece of code that looks like this GTM-XXXXXXX. Highlight and copy this text starting from the G and ending on the last letter or number.
- Switch over to wordpress and on the backend menu, under “settings” you will see “Google Tag Manager.” Click that option.
- In the first window, under the “general” tab, you will see an empty field titled “Google Tag Manager ID.” Paste your GTM code snippet into that box.
- Click “Save Changes” and boom, your all set!
For Shopify Users:
- Download this google tag manager by forma plugin.
- Open google tag manager and login to your google account.
- Click “create account” at the top right.
- Fill out the empty fields and select WEB under “Where to Use Container”
- Accept the terms and conditions without reading them. (Just kidding everyone should always read the terms and conditions right?)
- A popup will appear that says “install google tag manager.” In the first box, second to the last line, you will see a piece of code that looks like this GTM-XXXXXXX. Highlight and copy this text starting from the G and ending on the last letter or number.
- Switch over to Shopify and on the backend….
- In the first window, under the “general” tab, you will see an empty field titled “Google Tag Manager ID.” Paste your GTM code snippet into that box.
- Click “Save Changes” and boom, your all set!
For Everyone else:
- Open google tag manager and login to your google account.
- Click “create account” at the top right.
- Fill out the empty fields and select WEB under “Where to Use Container”
- Accept the terms and conditions without reading them. (Just kidding everyone should always read the terms and conditions right?)
- A popup will appear that says “install google tag manager.” Highlight and copy everything in the first box and paste it as high between the <head> </head> script as possible.
- Go back to “install google tag manager” and highlight everything in the bottom box. Paste that script at the top of the <body> </body> script, directly after the first <body>
- Save your work and your all set!
How to make sure Google Tag Manager is working on your site
The quickest way to make sure Google Tag Manager is working is to preview it through the Tag Manager dashboard. At the top right you will see a button titled “preview”. Click that bad boy.
Jump over to the website your testing it on and, if you were already on the site, refresh the page.
With a fresh page, a window should pop up on the bottom of the screen with the Google Tag Manager summary. If that window pops up, you’ve correctly installed Google Tag Manager.
How to create a functional tag with Google Tag Manager:
The moment we’ve all been waiting for…..
We will use our beloved “Do Not Click!” button to explain the steps.
We need to be able to describe what our button looks like to GTM for it to know which piece of content to pay attention to. We call this description a variable.
Setting up Google Tag Manager variables:
The standard setting when first setting up a Google Tag Manager account only has page variables and the event variable selected to track.
To track the number of times our button is clicked, we need to configure the click variables.
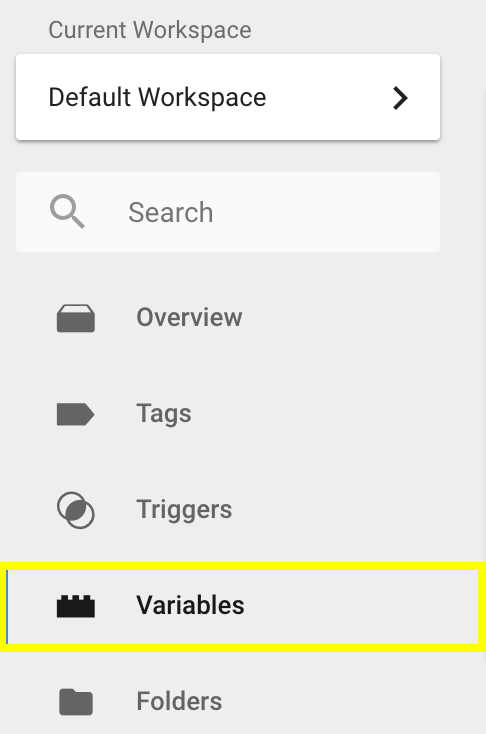
- Select the variables option in the Tag Manager menu (shown in the image on the left.)
- Click “Configure” at the top left under “Built-In Variables.” This will open a window of all Tag Manager standard tracking variables
- Scroll down until you see “Clicks”
- Select the checkbox of all variables below “clicks” from “Click Element” to “Click Text”
Setting up Google Tag Manager triggers:
To set up our trigger, we first need to verify which variable we will be utilizing in order to indicate which piece of content GTM should be paying attention to. The only way to do this is to set up a generic click trigger first.
Setting up a generic click trigger:
A generic click trigger allows us to click any element on our site and see which variables were associated with that click. This will make more sense once we create the actual trigger.
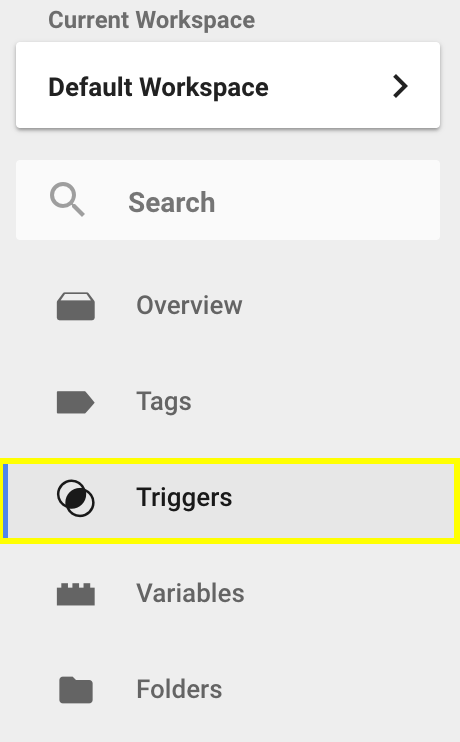
- Click “Triggers” on the left Google Tag Manager Menu.
- Click the red “New” button.
- Name the trigger. I usually name it “Click Trigger” to stay generic.
- Click “Choose Trigger Type” and a menu will appear on the right hand side.
- Under the “Choose Trigger Type” menu you will see “Click” and just under that, you will see “All Elements” select that.
- Click save and hit preview to see the changes on your live website.
Knowing which variable to use:
For our tag to accurately fire we must know which variables are associated with the action you wish to track. Now that we have our generic trigger set up we can see these details on our live website.
Make sure to refresh the page before moving any further. This will update the changes we just added on GTM.
Go to the element you will be tracking, hold command or ctrl on your keyboard and click the desired object.
Before click

After click

Once we have clicked, our generic click trigger fires and shows us all the variable details involved in that click. These are the variable options we can use to set up a trigger in GTM. For the case of this article, we are going to use “Click Text” as our trigger variable.
Tracking button clicks with triggers:
Now that we know what variables we are going to use to fire our trigger we can head back over to google tag manager and navigate back to the “Triggers” tab on the left GTM menu.
Click “New Trigger” and follow the following steps:
- Name your trigger: (We named ours “DO NOT CLICK T”
- Click “Choose Trigger Type” and under Clicks select “All Elements”
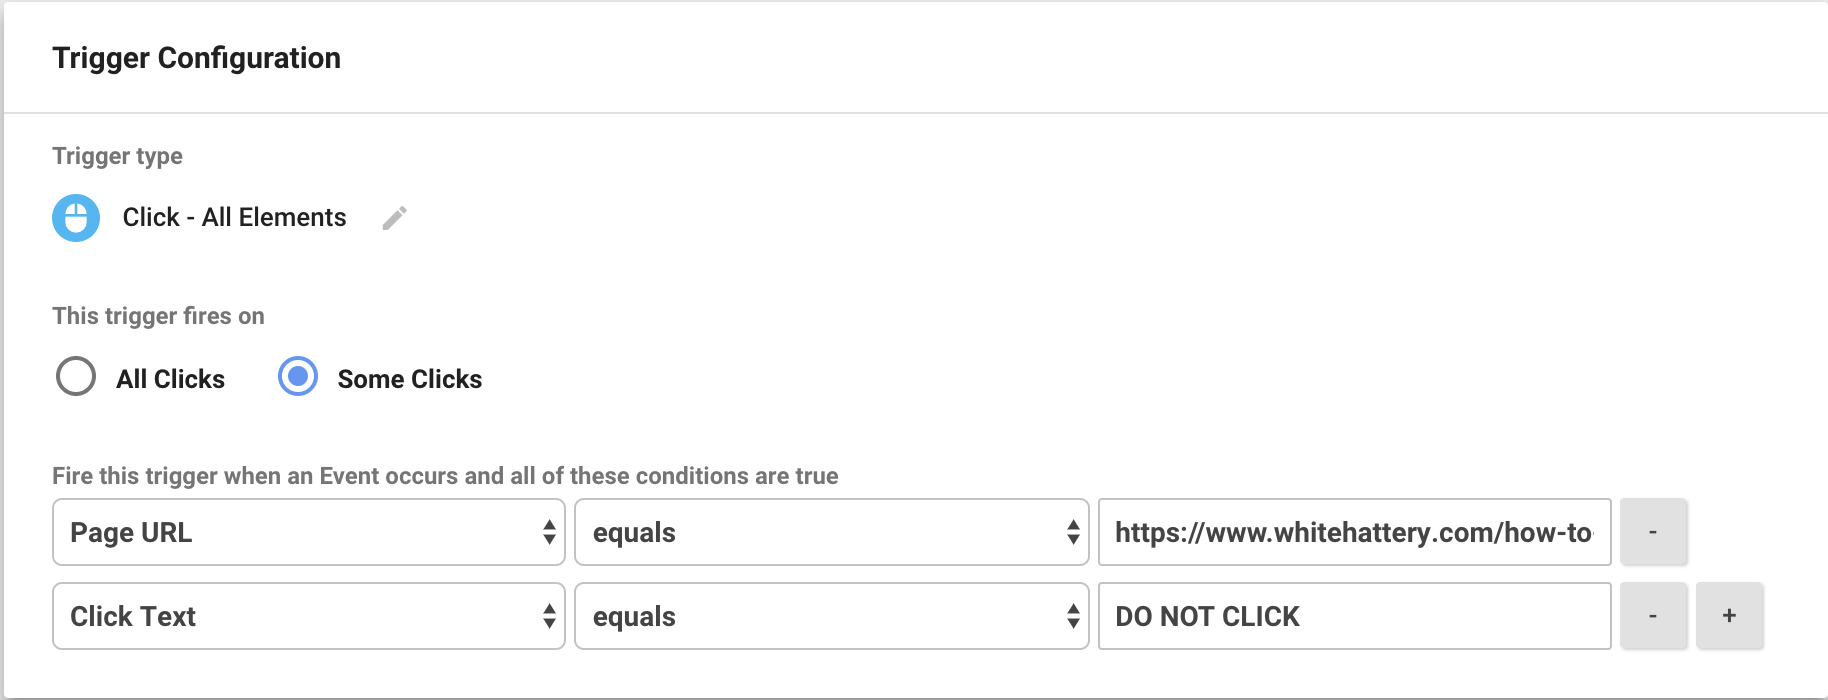
- Under “This trigger firs on” select “Some Clicks” instead of the automatically selected “All Clicks.” This will reveal our conditions menu.
- The first condition is set to our page URL. We only want our trigger to fire on this page.
- Click the plus sign on the right of the first condition to reveal the second condition.
- Select “Click Text” or, if you are using a different variable type, select the variable category you are using.
- Once you’ve added the second condition, click save.
The final product should look like the image below:
Creating a tag in Google Tag Manager:
Now that we have our triggers and conditions set up to fire when our button is pressed, we need to associate it with a tag. The tag will be the information that gets sent to Google Analytics when the trigger is fired.
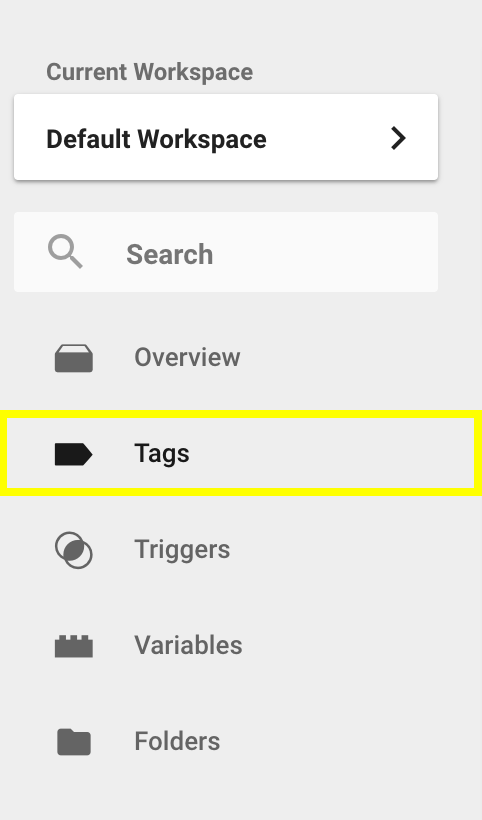
- Navigate to the “Tags” section on the left GTM menu.
- Select “New.”
- Name your tag. (We named ours DO NOT CLICK)
- Click “Tag Configuration” and select “Google Analytics.”
- There will be a dropdown menu currently showing “Page View.” Click the drop-down and select “Event.”
- This is going to give you 3 different empty field boxes. (Category, Label, and Value). This is how the information is going to be labeled in your Google Analytics so it’s important to name them in a way that will keep you organized. You can see our example below.
- The last item is your “Google Analytics Setting.” You can select “New Variable” and add your Analytics Tracking Code into the empty field.
- Click “Triggering” below and select the trigger we created earlier.
- Click “Save” at the top right and you’re all set.
Making sure your tag is working correctly before submitting:
We are going to want to make sure we set everything up correctly before submitting our changes live on GTM.
To do this, click “Preview” at the top of the GTM account homepage, switch to your live website and refresh the page. The preview window should pop up and your tag should be expressed below “Tags Not Fired On This Page.”
Hold Command on Mac or Ctrl on PC and click your button. This should fire the tag which will be expressed on the GTM preview window under “Tags Fired On This Page.” You can see the example below:
Before click

After click

Submitting your changes in Google Tag Manager:
THE MOST IMPORTANT STEP. Make sure to remember submitting your changes in Google Tag Manager. On the main dashboard, at the top right, there will be a “submit” button. Click that and follow the steps to submit your changes. Once you do that, our tracking data will now be firing and sending information to Google Analytics.
How a tag looks in Google Analytics:
Let’s take a look at how our data from this button is being tracking and how it will look in Google Analytics.
Google Analytics events:
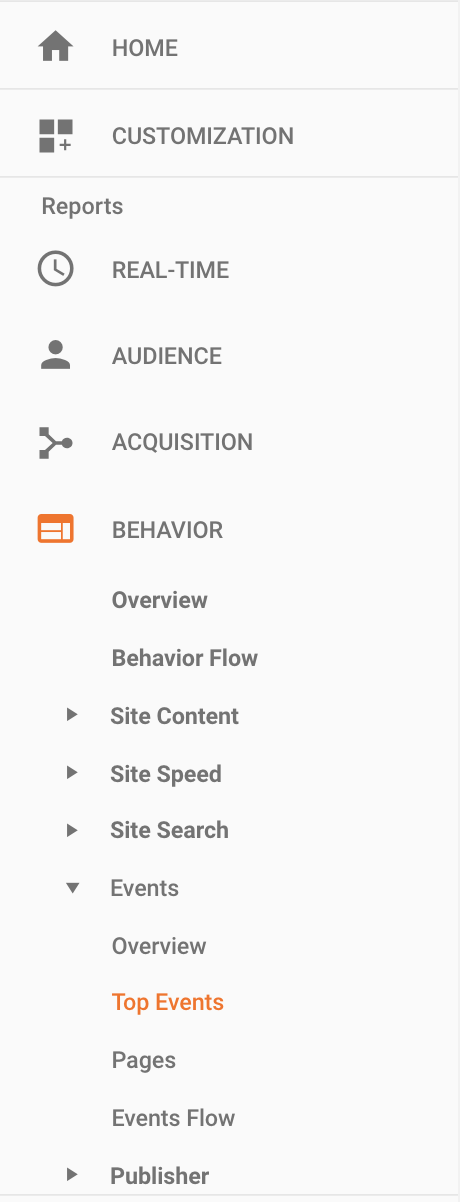
On the left side menu in Google Analytics you will see the “Behavior” option. When you click that it will dropdown a secondary menu. One of those options is “Events.” Click on events, then “Overview”
This will show you an overview of all the tag categories that have been triggered within your selected time period. You can see the hierarchy of “Event Category”, “Event Action”, and “Event Label” that we organized when setting up the tag.
We are tracking the button interactions on our blog so our Category is “blog”, our Action is “button clicks”, and our Label is “DO NOT CLICK.”


Getting creative with Google Tag Manager:
Google Tag Manager is an incredibly useful tool that allows us to track the assets on our website and make better marketing and content development decisions. We can add values to our tags that express the exact value in $$$ that piece of content has every time a visitor interacts with it.
This article just covers the surface of what is possible. Make sure to include Tag Manager in your website strategies to optimize the performance of your content.